
Hey Everyone!
I hope you all have been having a wonderful summer. We have been traveling non stop seeing family and friends and enjoying Seth being home. We are home for a few days and I have been wanting to post all our home before and after photos for a while so now I am finally getting to the kitchen this week so I hope you enjoy ALL of the pics. (Warning, like always, there is a lot as I love to remember every detail of the work we did last summer!)
When we bought the house last summer, we knew we wanted to make some changes to the kitchen area but did not have the budget for new cabinets, countertops, backsplash, or flooring! That left us with thinking of ideas of how we could utilize what we had in the kitchen and make the most bang for our buck in easy (but laborious) cosmetic changes. Without the help of both set's of our parents, this would of taken us FOREVER, but both our families helped us so much!
The first part of the post I'm walking you through the changes we made, step by step, and at the end of the post you can see the amazing photos my friend Chandler shot of our kitchen a few months ago. She made it look even 100X better than it does in person... I'm not kidding. LOL I don't know how she does it. Check her out here: www.chandlergrace.com <3
It is so fun to go back through these photos and see all the hard work we put in now paid off.
Enjoy!
This first photo is from when we were looking at buying the house.


It is really hard to tell in all these pictures but the cabinets are a really light blue and have the original hardware from 1956.


Our main goal for the kitchen was the make it as bright as possible! I'm so thankful that we were starting with a mostly clean slate in the things we couldn't change right now financially. We have a white (ish) LOL linoleum floor, white countertops, and a white backsplash. PRAISES that we didn't have orange floors, red countertops, and a green backsplash! WHEW! The picture below is just from one coat of white ceiling pant on the ceiling! Already such a difference from the above picture ceiling color.


Below is another close up picture of the old ceiling color to the new stark white. We painted all the ceilings in our house and it really made the whole space feel so much brighter. We also took down all of the old light fixtures, fans, and vents. I purchased all new white vents from Lowe's as well as LED white circle lights that mimic can lights for the kitchen that were really inexpensive. We then also took out the baseboards in the kitchen as well.


Another thing I wasn't crazy about at first was all of the wood paneling in our kitchen and our master bedroom. It felt really dated and old to me personally and I remember googling and Pinteresting for hours in our old apartment looking for ways to make it feel updated. I was originally going to add wood to all the paneling and change the style of it, but as we did a few coats of the bright white paint, I ended up really liking how it looked! It's amazing what paint can do. We used Valspar white trim paint.

The next two below pictures are just with two coats of paint to the wood paneling which again just made it feel so bright.


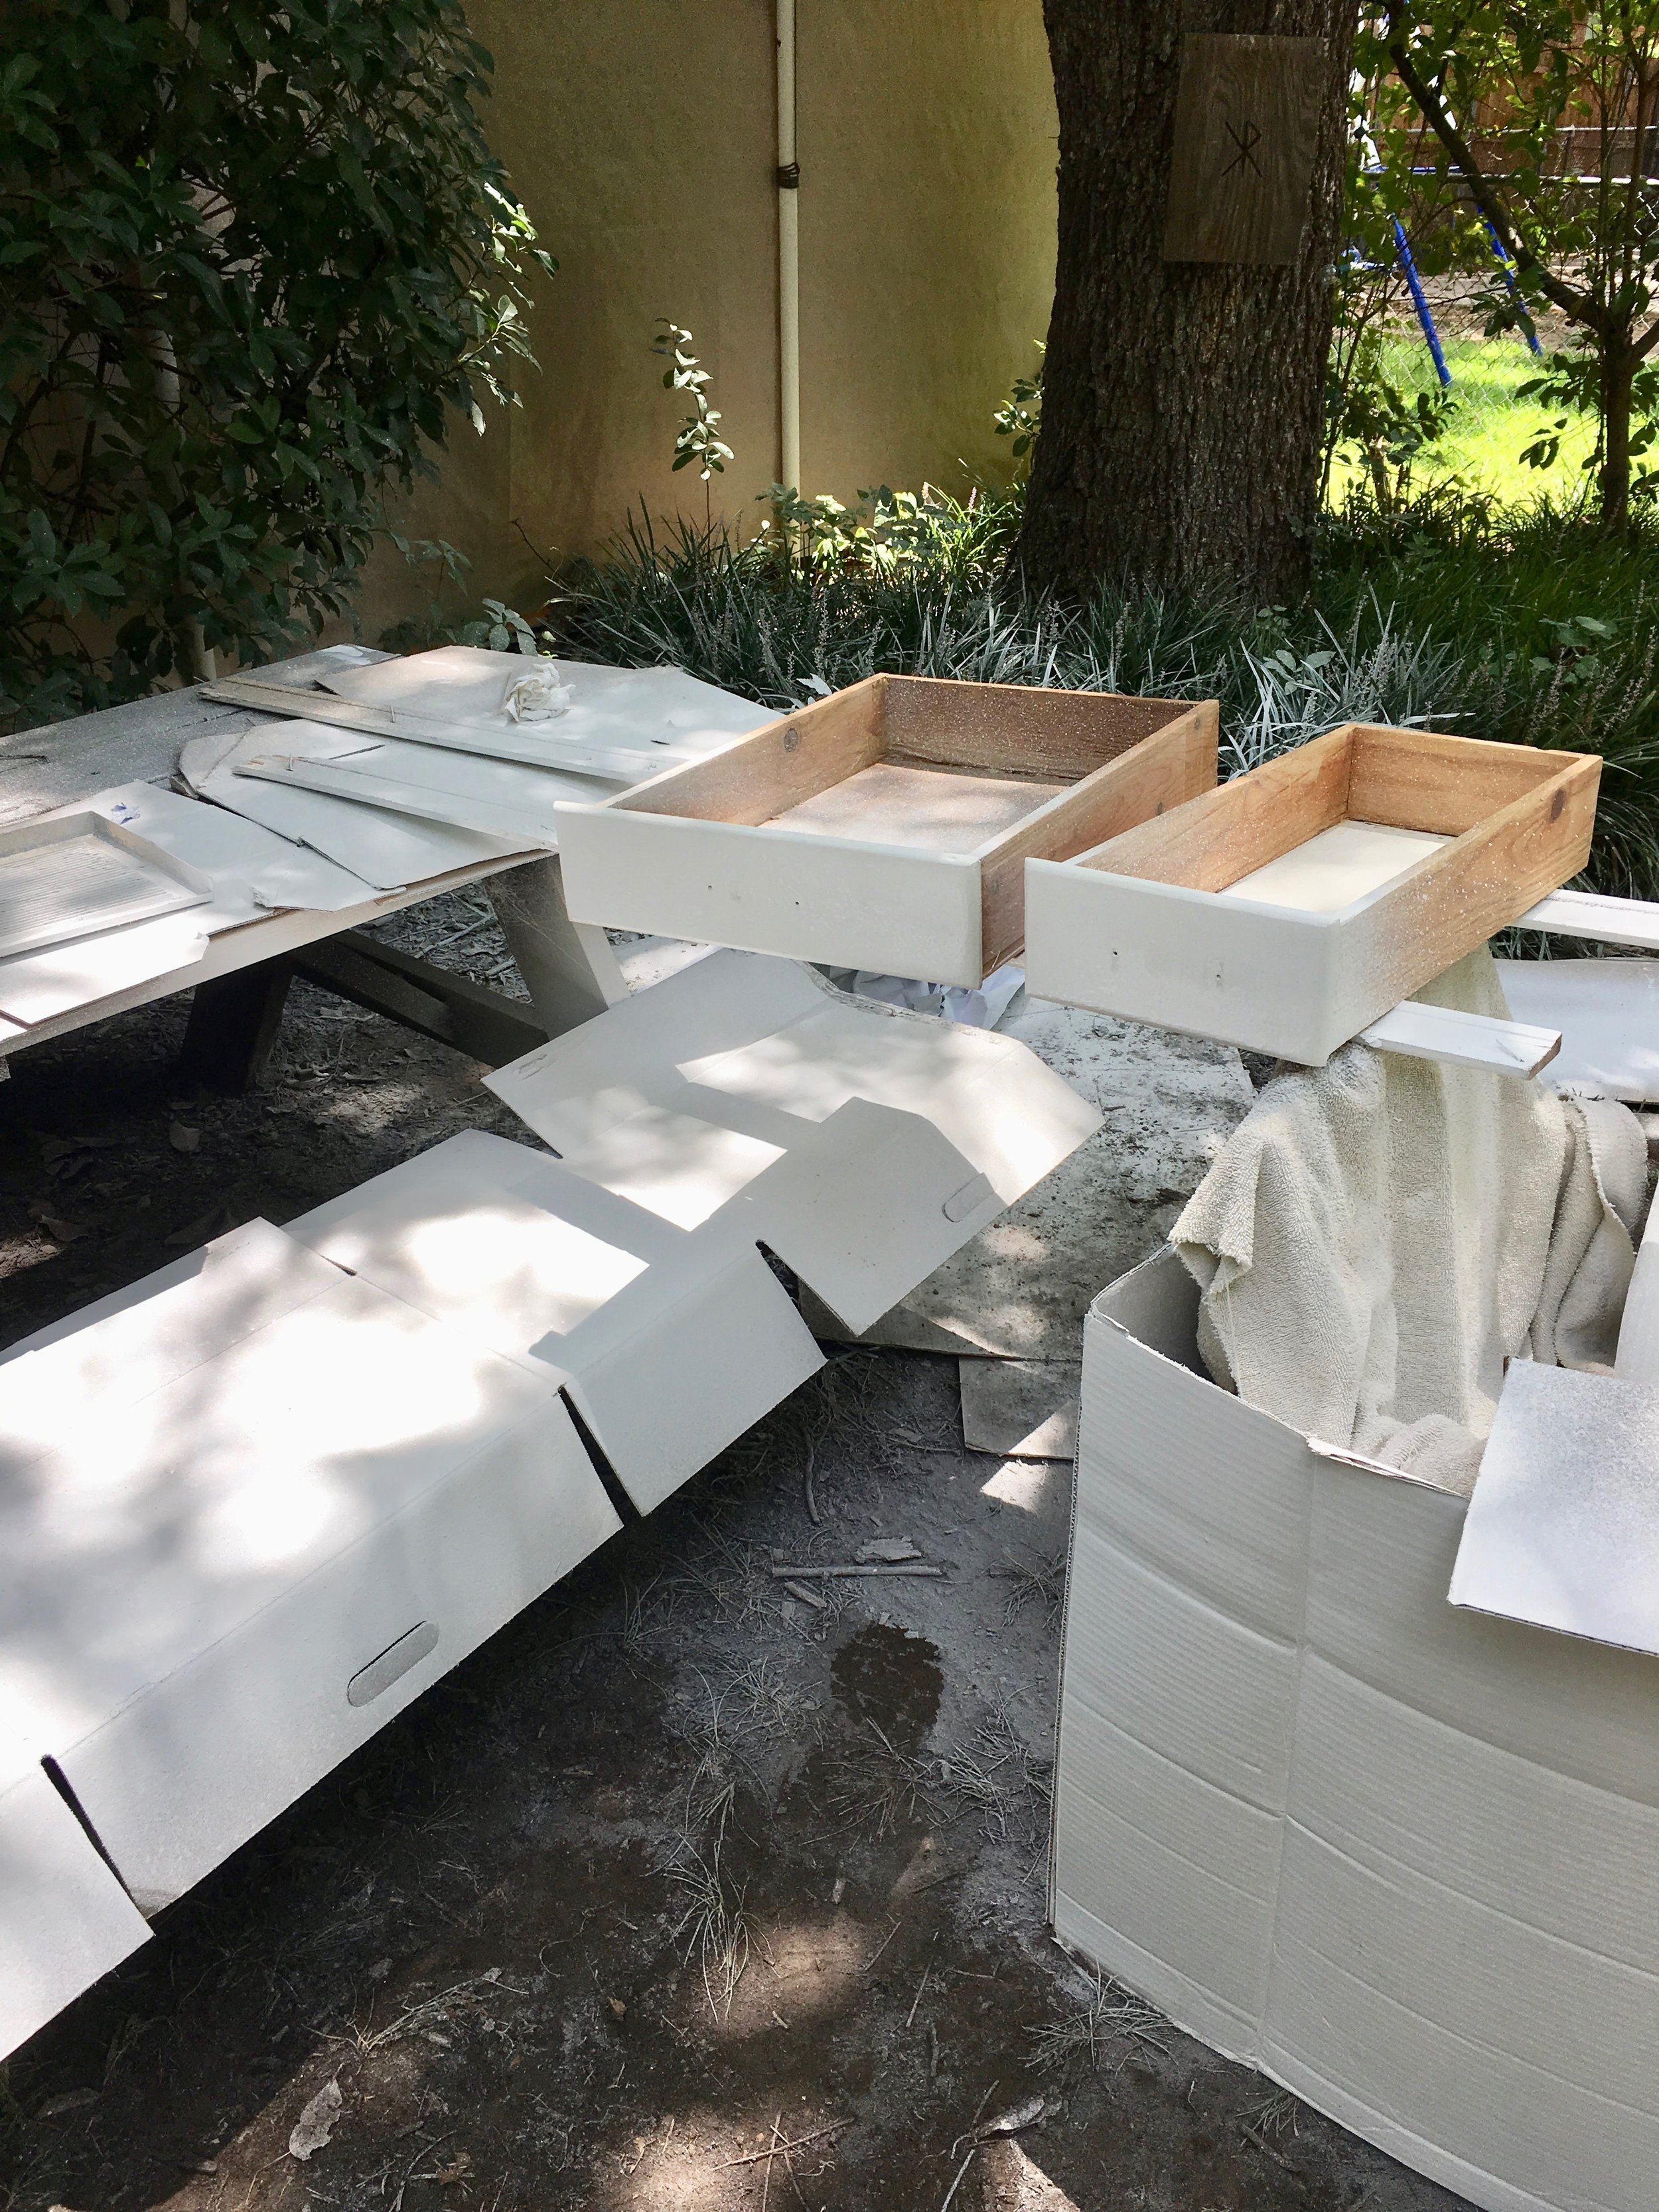
Our most time consuming project in the kitchen was easily the cabinets. This was a serious team effort but I'm so happy with the way they turned out as I think it made a huge difference. Our first step was to remove all the cabinet doors and the hardware. Next, my father in law and husband used an electric sander and sanded all of the cabinets down.


I had seen on a blog last summer where a lady and her husband had taken her flat cabinet doors and made them shaker style by using wood strips. As easy as this sounds, it did take a lot of effort as our cabinets were not perfectly squared or rectangle. My husband and father in law first cut the wood stripes to the desired lengths of each cabinet and then nail gunned them onto the doors.


They then took wood filler to fill in all the small creases and cracks and to make the edges completely square so there wouldn't be an awkward rounded edge on each side of the cabinet. (See photo below as they added the wood filler to all the edges). They then had to sand the edges and the wood filler to make it completely smooth.

We also purchased a paint sprayer for this process and my husband sprayed all of the doors and drawers.

I love seeing this little picture of Haddie! STOP GROWING!

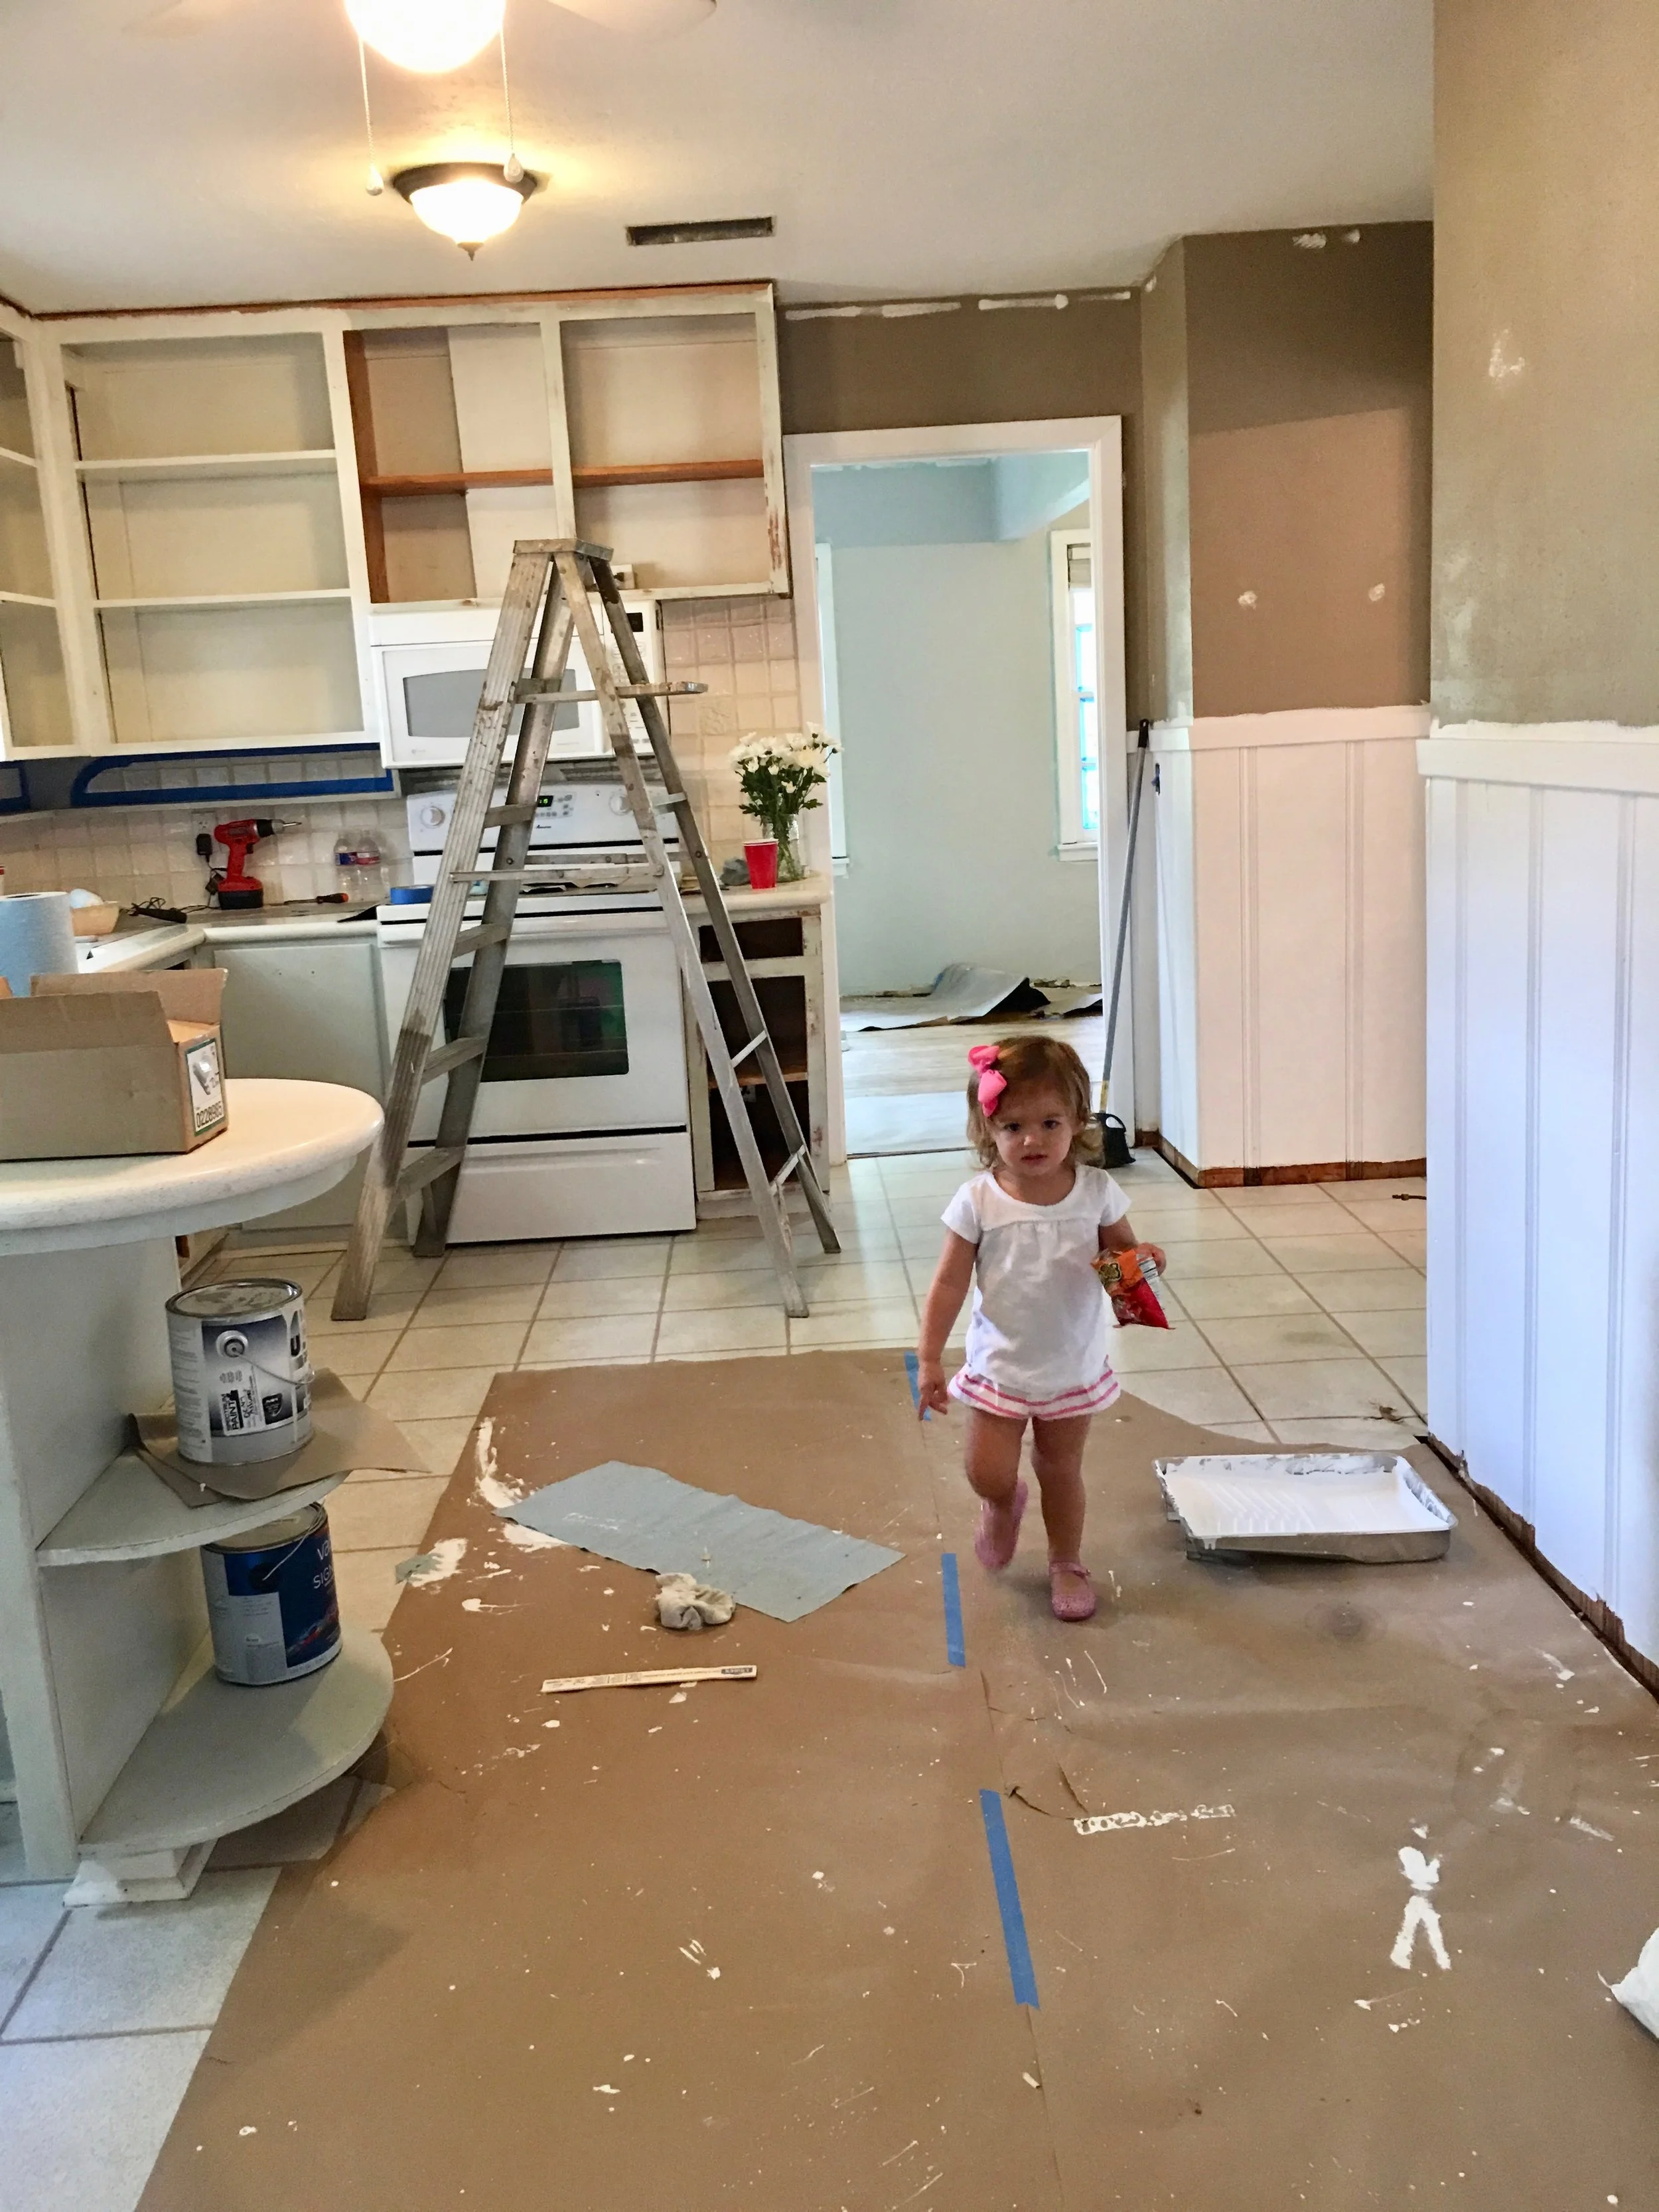
So the picture above and the picture below are here to highlight my poor choices in paint color, which always ends up in more work. LOL but not really funny at the time. This is no joke. Seth can count on both hands how many times I have chosen paint colors that do not end up being what I want. I even research paint colors online and this STILL happens to me. I need help.
The color I first had my dad paint in our kitchen was called Ashwood by Benjamin Moore. I do LOVE this color of paint as it was the color of my whole house back in Branson but in this kitchen.. it just felt so yellow or blah to me. IDK why but for some reason it just didn't look good to me in the space, even though I loved it in my last house.
The picture below is where I went and choose a "white" paint after much research on white pants and choose Swiss Coffee by Sherwin Williams. Yes, this is a cream more than a white but everyone said you cannot tell as it gives the white color some warmth. Well, next to my stark white paneling, it looked yellow. I left it for like two days contemplating if I wanted to repaint them again as it took FOREVER, and then decided I wouldn't be happy until I painted them the same stark white that I had done with my trim and paneling.


As you can see, everything just looked more "tan and yellow" instead of "fresh and white" and so after all this painting I gave a BIG SIGH and said, let's repaint. The WORST.

Picture below is the grey I chose instead. (Thank you Fred for repainting it!!!) Repose Grey by Sherwin Williams. My living room and hallways are also this color and I really love it! I think this grey made such a difference compared to Ashwood. It's crazy what paint can do. I think the Ashwood blended with my floors too much for a cream/tan feel and the grey really drew your eye up from the floor!


And WA LAAA!!! Fresh white cabinets. Exactly what I wanted (and what Seth told me to pick the first time -- I won't admit that to his face as I still remember gulping when I bought 2 gallons of Swiss Coffee already feeling like it wasn't white enough.) LOL

New light fixture from Lowe's went up as well, along with the new vent's. We ended up getting a new door to the backdoor and Seth and his dad reframed it as well.

Finding the correct hinges for putting the cabinets back on was a little trickier than we thought but we finally found some after a few trips to the hardware store that worked perfect. Getting them all straight was a chore but I have an amazing husband and father in law that made it all happen!


Lastly, we tore down the strip along the top of the cabinets and replaced it with a new molding. We also added brushed brass hardware to all the cabinet doors and drawers. Finshed off the baseboards around the painted wood paneling.

I hope you enjoy seeing the afters. For our budget, we got exactly what we wanted:
BRIGHT, AIRY, AND WHITE on a budget.
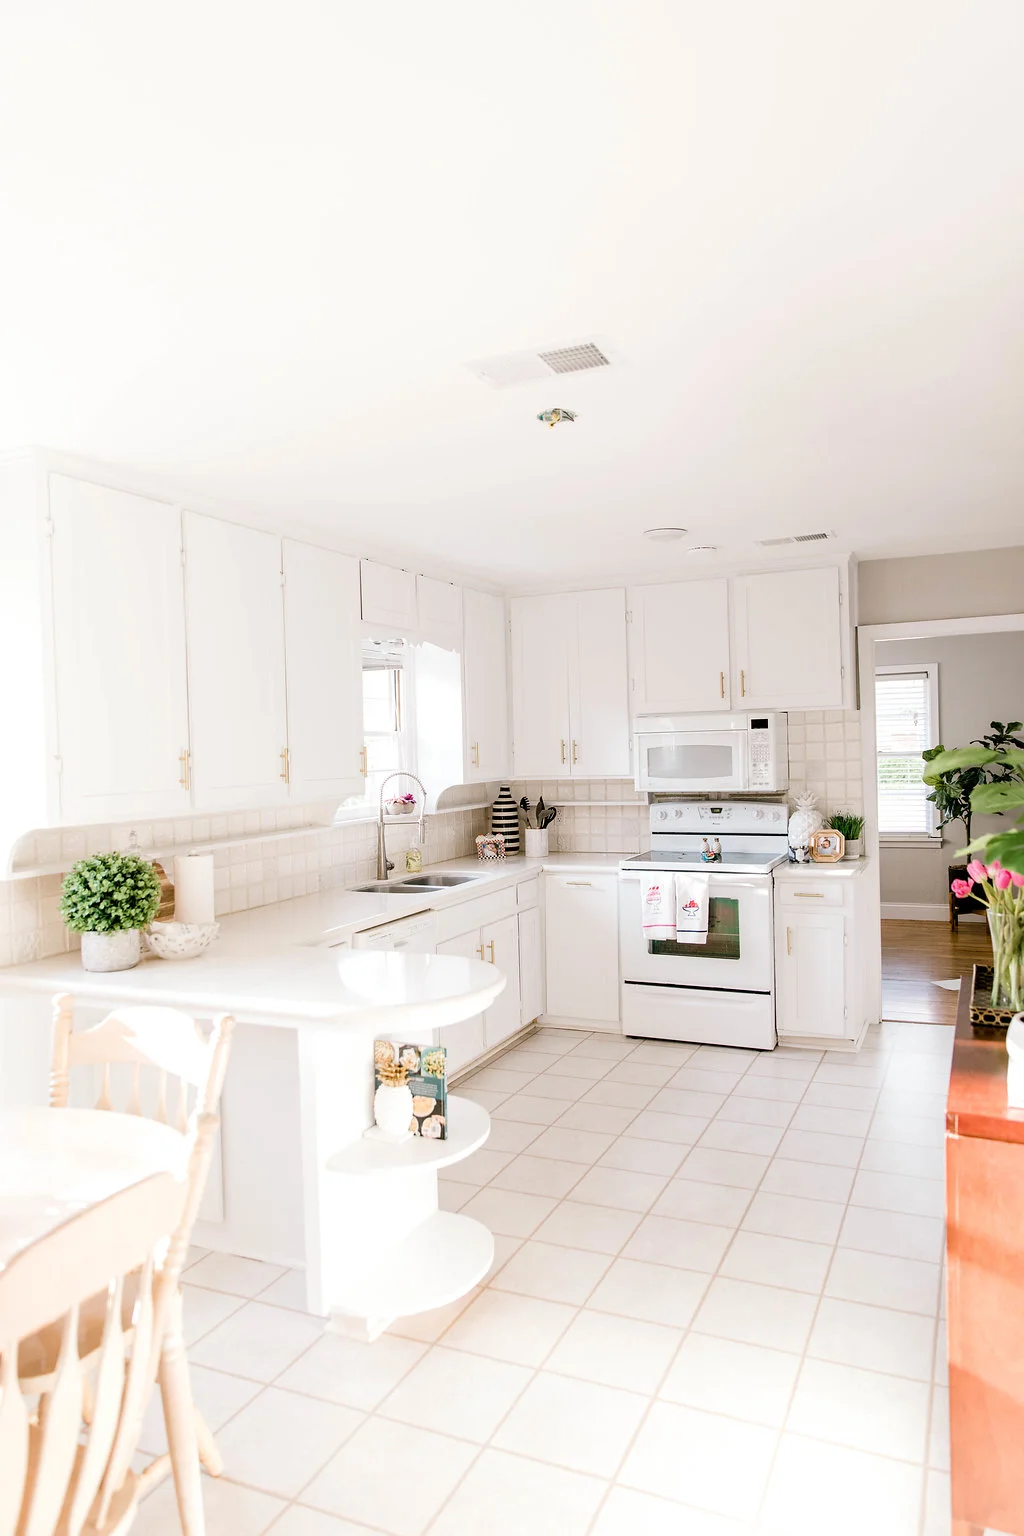


My favorite thing now about our kitchen is the way the cabinets turned out. The love that my family put into these made them perfect for us and the shaker style really updated the feel for me! I am really glad I painted it stark white because I love accenting with color.
What do add: We still have two cabinets without knobs (whoops, where does the time go?) and I have a missing light fixture I won't mention so you won't notice it! LOL I would also like to add a bright rug to the floor in front of the kitchen sink. A round, wood pedestal kitchen table is also in my dreams, along with subtle striped roman shades. If we choose to do any "BIG" projects to the house, the kitchen floor is also at the top of Seth's and I list in the future. For right now though, the more macaroni and cereal on the floor -- doesn't faze me! HA
If you are at the end of this post, thanks for reading! Thank you Chandler for our family pictures too! We love them and you!
xo, Ashley


Throwing it back to a few months ago when Chandler came and took some photos of our house as I love seeing the changes we made in the year we have lived in our home! I'm continuing the next room BEFORE/AFTER post with the living room/office area…